DIY Shock Sensor
Step 1: Find a Speaker


You will need to find a speaker that you are willing to sacrifice for this project. You can buy one at SparkFun for under a dollar, but you probably already have one somewhere. I used a small speaker from an old pair of headphones, but you can find one almost anywhere - like a musical greeting card or an old alarm clock. Next:


- Cut a jumper wire in half
- Strip the ends of it
- Solder it onto the speaker (there were probably already some wires on there - just cut them off)
- Alternatively, you could use alligator clips if you have them.
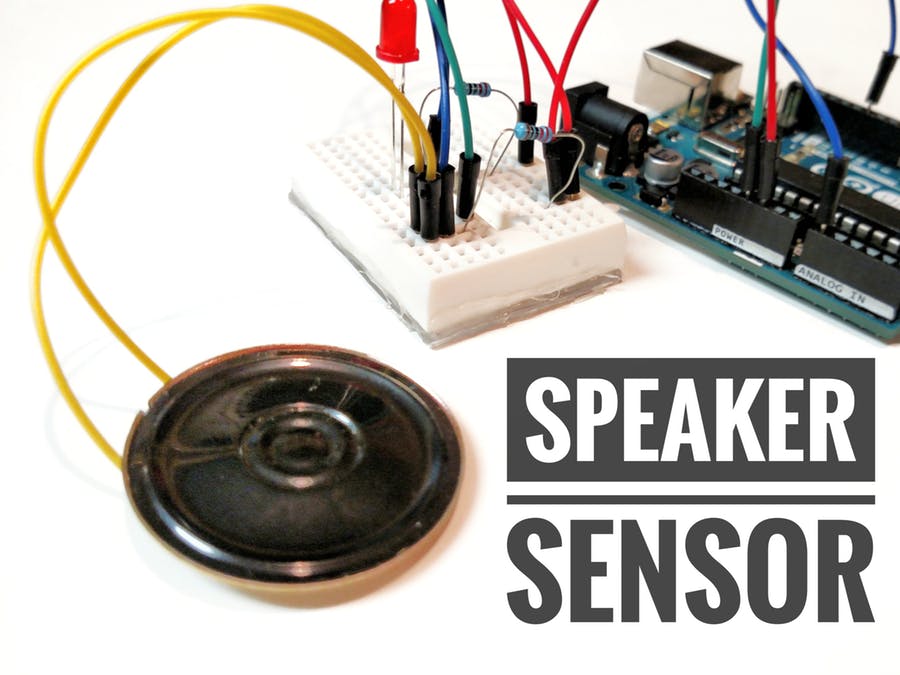
Step 2: Build the Circuit

Materials needed:
- Arduino UNO
- Breadboard
- Jumper wires
- An led (any color)
- Two 220 ohm resistors (red-red-brown)
- A speaker
- Follow the above diagram to connect it all to the Arduino.
Step 3: Upload This Code
Upload this code in the Arduino IDE. You will probably need to calibrate it since you are not using the same speaker as me, so I'll explain how to do that in a few steps.int shockMin = 996; //you might need to change these
int shockMax = 1010; //you might need to change these
void setup() {
pinMode(11, OUTPUT);
// Serial.begin(9600); //uncomment this to help with calibration
}
void loop() {
int shock = analogRead(A0);
int lightval = map(shock, shockMin, shockMax, 0, 255);
if (lightval > 0) {
analogWrite(11, lightval);
}
else {
analogWrite(11, 0);
}
// Serial.println(shock); //uncomment this to help with calibration
}
Step 4: How to Use It
Press on the center of the speaker with your finger and it should make the led blink. If not, you will need to calibrate it in the next step. Otherwise, you can try attaching the speaker to something. Maybe you could make a drum by taping it to a paper plate? - Try using pencils as drumsticks.Step 5: Calibrate
If your led is already blinking satisfactorily, you can skip this step. Otherwise, follow these steps:- Delete the "//" on the lines that say "//uncomment this to help with calibration"
- Upload the code and open the serial monitor
- Press on the center of the speaker and watch as the values change
- Change the shockMin and shockMax variables to the low and high values in the serial monitor
int shockMin = 996;
int shockMax = 1010;
For example, if the serial monitor reads 700 as the non-pushed state of your sensor (when it's just sitting there), and when you push it it goes up to 860, change the shockMax to somewhere around 900 (just a little above the sensor reading) and the shockMin to about 680. Next:
- Close the serial monitor
- Upload the new code
- Press on the center of the speaker some more
If it all goes right, the led should turn on only when you press the sensor.


