Posts

Showing posts with the label Arduino

Rubber Band Gatling Gun Turret (Arduino)

Image
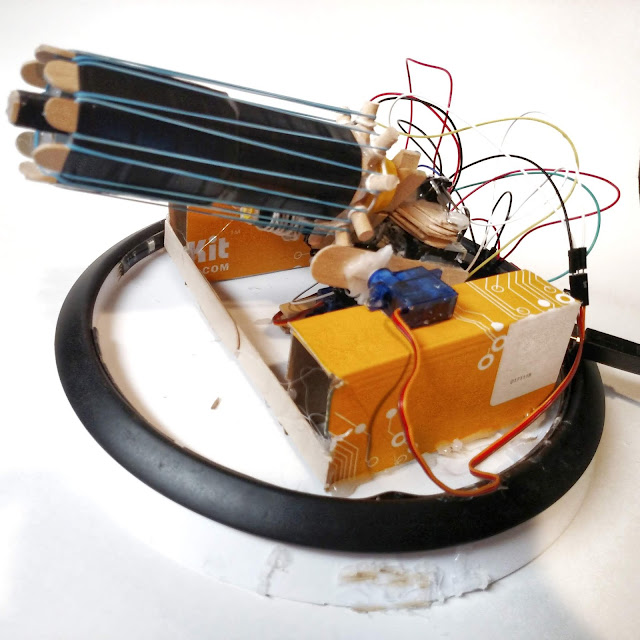
T his is an Arduino controlled rubber band Gatling  gun.  It can hold about 20 rubber bands and it is operated with a USB game controller through processing.  The complete bill of materials can be seen below: Arduino UNO https://amzn.to/2DLjxR2 Jumper cables https://amzn.to/2Q7kiKc Breadboard https://amzn.to/2RYqiSK Servo motors https://amzn.to/2S6E5GZ Gear motor https://amzn.to/2DQUr3u Rubber bands https://amzn.to/2S8zgwR Electrical tape https://amzn.to/2BpvF8a Lego pieces https://amzn.to/2DROMtU Craft sticks (big) https://amzn.to/2zldtuH Craft sticks (small) https://amzn.to/2zldG0X Hot glue sticks https://amzn.to/2TCRND4 Binder clips https://amzn.to/2KnZWa3 Clothespins https://amzn.to/2BpOw2K Cardboard https://amzn.to/2BpOSGC Lazy susan https://amzn.to/2OVr4xH Diode https://a...

DIY Shock Sensor

Image
A speaker works by activating an electromagnet which is nearby a "regular" magnet. This produces vibration, resulting in sound. So if instead of supplying current to the speaker, we can produce current (if very little) by moving the speaker itsself. This current can then be detected and interpreted by a microcontroller such as the Arduino. Step 1: Find a Speaker You will need to find a speaker that you are willing to sacrifice for this project. You can buy one at SparkFun for under a dollar, but you probably already have one somewhere. I used a small speaker from an old pair of headphones, but you can find one almost anywhere - like a musical greeting card or an old alarm clock. Next: Cut a jumper wire in half Strip the ends of it Solder it onto the speaker (there were probably already some wires on there - just cut them off) Alternatively, you could use alligator clips if you have them. Step 2: Build the Circuit  Materials needed: Arduino U...

Make Your Own Arduino Library

Image
Arduino is pretty heavily based on C++ (a computer programming language). This language relies upon things called headers, functions,and libraries. These things actually carry over to Arduino too - libraries are included at the top of your code and are used in order to simplify your project code: #include <LiquidCrystal.h> #include <Servo.h> In this project I will demonstrate how to make your own Library. Step 1: Software There is plenty of specialized software you can use for this, but your basic text editor like Notepad should work. *You could also try something like Notepad++ or VSCode Step 2: Arduino Code This is a basic Blink sketch to toggle the on-board LED: void setup() { pinMode(13, OUTPUT); } void loop() { digitalWrite(13, HIGH); delay(1000); digitalWrite(13, LOW); delay(1000); } This code isn't very complicated, and it generally wouldn't need a library. However, for the sake of demonstration, we will make one anyway. ...